
Using the SAP Cross-System Viewer - Compare two linked SAP systems
Using the SAP Cross-System Viewer - Compare two linked SAP systems.
It is typical these days for large organisations to have multiple SAP systems in their ERP landscape and to connect those ERP systems through APIs and ALE linkages. Common use cases can be separation of systems for commercial and operations purposes, as well as separation of systems due to merger and acquisition activities.
Very often, in these types of environments, certain customising and table settings need to be very similar in the two systems to allow smooth flow of traffic between the two. However, keeping two complex SAP systems in line from a customising perspective can prove extremely challenging. For example, sometimes you may have huge tables with hundreds or even thousands of entries and it may be useful to check the entries in each client against each other.
In order to assist with these kinds of challenges, there is a useful tool in the SAP armoury known as the Customizing Cross-System Viewer. The purpose of this tool is to be able to compare customising and table entries between two linked systems. Let’s explore how this is run and the functionality it has to offer.
To open the tool, enter transaction OY19. Your logon and comparison client must be connected in SM59 – a very simple task which your basis team can set up for you if not already done. Normally when you are dealing with two connected systems, this step would already be complete and the connected system will show in the available drop-down list.
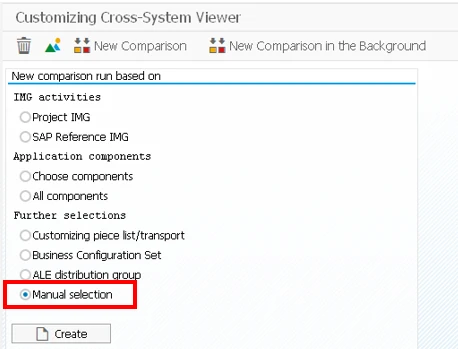
The screen then presented to you is as below. I will run through an example of comparing table entries between the systems. However, you can see from the screenshot that there are other options available, such as comparing customizing entries for a specific IMG Project or a more general IMG comparison.
To create a comparison to run, select “Manual selection” and “Create”:
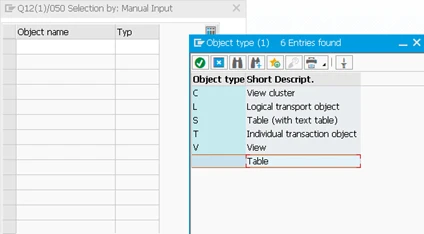
From here you select “Table” (blank in Type) and then add the table you wish to compare in the Object name:
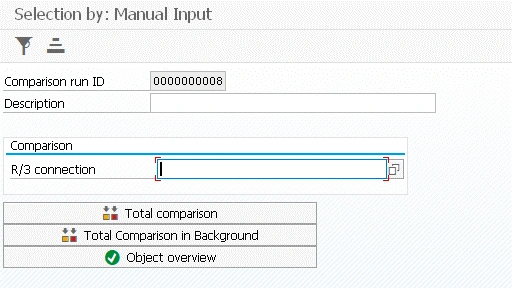
You then need to select the connected system – this is where your SM59 connection is required. Then run “Total comparison”:
You will be presented with several dialogue messages – accept them all and run the program to show all the results. Despite the warning about performance, the program runs very quickly for a single table. For more complex comparisons, consider running the program in background.
When you get the results of the comparison, there is some interpretation necessary. For example, the results will have a tag next to each of them detailing the comparison result. Double clicking each entry takes you to the details. The full list can be filtered in this field by clicking the Filter button.
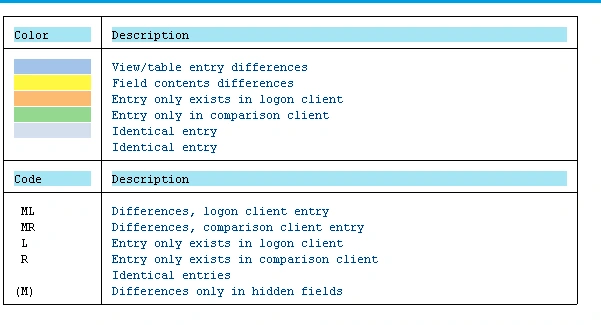
The comparison results against each line are set out as below:
- [blank] – entries identical
- L – entry only exists in logon client
- R – entry only exists in comparison client
- ML – modified entry from logon system
- MR – modified entry from comparison system
The full legend can be seen in the results screen by clicking on the Legend button:
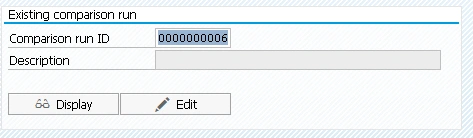
Once you have created this comparison, SAP will save it and you can run it again simply by selecting the Comparison run ID from the front screen:
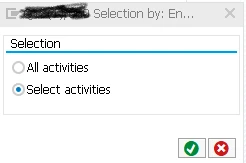
As already mentioned, the tool can also be run to check customising settings between linked clients. A useful feature here is to select multiple customising areas to compare.

It is worthwhile restricting by customising area for performance purposes.
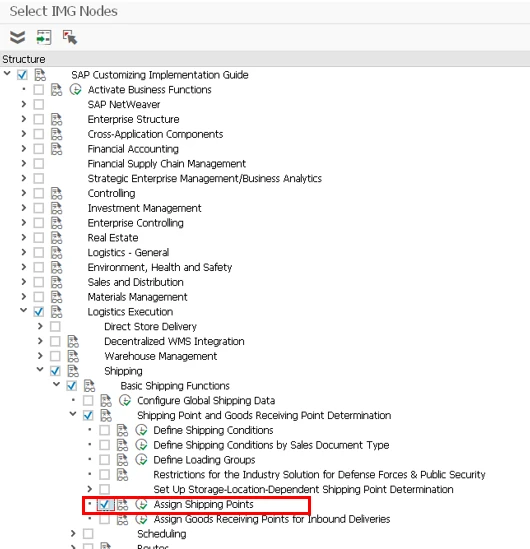
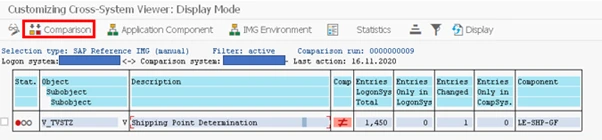
For this test, I have selected the shipping point determination table:
The system then reads the number of records to be compared and presents the below screen.
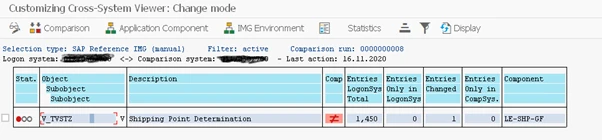
All the customising areas would be presented as separate lines in the report if more than one had been selected. In the line above, we can see that we have the following details:
- 1450 entries in logon system
- Zero entries in the logon system but NOT in the compared system
- 1 entry which is different
- Zero entries in the compared system but NOT in the logon system
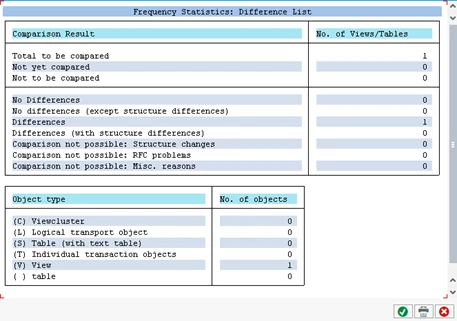
The high-level header results can be displayed by clicking the “Statistics” button. For my example above I am only comparing one customising entry and so the statistics only refer to one entry:
Once you are ready to review the results, select the line item you wish to see the results for and select “Comparison”:
The system then logs you into your comparison client and runs the check. Before it does this you get the opportunity to restrict the data to check in the comparison client:
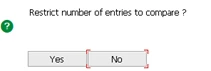
By selecting “Yes” you can add filters on to the available fields in the object you are comparing (in this case, the shipping point determination table):

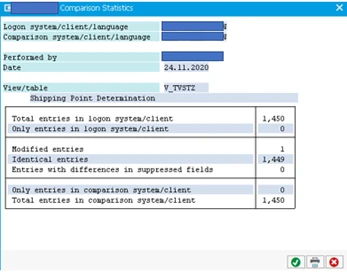
Once the results are compiled, they are presented in the same way as our table entries. From the results screen, if you click on the “Statistics” button, you will get statistics relevant to the item details – more useful than the statistics for the header, which we saw earlier.
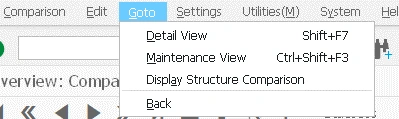
A further useful function from here is to navigate to the structure itself to maintain the entries and make any corrections. To do this, select the item from the results list you wish to maintain and then select Goto>Maintenance View, as below.
This then opens the view to amend the records.
As a bonus, there is an additional VERY handy feature which needs explaining. You can access this comparison tool from within the table maintenance transaction SM30. When within the table in maintain function, click Utilities>Adjustment as below.

You are then asked for the comparison client and from there you can run the comparison as normal. The key difference here is that there is a new button available:

This “Adjust” button allows you to align the clients for individual entries in the comparison report at the touch of a button. For example, by clicking an entry which is different in the two clients, I now have options
:

From here, I can copy the entry from the comparison client to the logon client (note, this cannot be done the other way around), copy an individual field for an entry into the logon client where they differ, copy all selected entries to the logon client, delete the entry from the logon client or delete all the selected entries from the logon client.
This tool can save hours or even days of comparisons when dealing with huge tables and saves you the need to export to excel and undertake complicated vlookup formulas to correct the data.
Good luck!
More Blogs


